Day 3 Recipe 2 & 3
So today I made my very first homemade pie crust. I think it turned out pretty good! It wasn't as hard as I thought it would be. I just had to be patient and let it sit the whole time in the refrigerator to make sure that it was good and cold. I made the pie crust for my Blueberry Crumble Pie. It was so yummy! I couldn't really taste to see if I did a good job on the crust or not because the blueberries were so good! This is a definite make again recipe!
It was time consuming to make the crust and then the pie. I started at about 9:30 this morning and with all of the wait time for the crust, I pulled the pie out of the oven at 1:00 this afternoon! I am not entirely sure if the crust was worth it or not... I personally just like the Pillsbury Pie Crust that just comes out of the box!!
My first homemade crust, before I put in the filling.

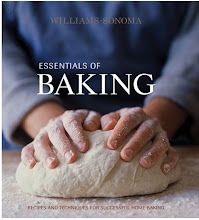
Recipe from Williams-Sonoma Essentials of Baking
Ingredients:
Pie Pastry for single crust pie
3/4 cup plus 5 tablespoons all-purpose flour
2/3 cup firmly packed golden brown sugar
1/3 cup sugar plus 1 tablespoon for filling
2 teaspoons cinnamon
1/8 teaspoon salt
1/2 cup cold unsalted butter, cut into pieces
5 cups of blueberries (about 2 1/2 pints)
Directions:
1. Line 9 inch pie pan with pie crust and prebake according to package directions.
2. In a large bowl, stir together the 3/4 cup flour, 1/3 cup of the brown sugar, the 1/3 cup sugar, 1 teaspoon cinnamon, and the salt. Scatter the butter pieces on top and toss with a fork to coat with the flour mixture. Using a pastry blender or a fork, work the ingredients together until the mixture forms large, coarse crumbs the size of peas. Set aside.
3. Position rack in the lower third of the oven, and preheat to 375 degrees.
4. In a large bowl, combine blueberries, the remaining brown sugar, the remaining cinnamon, and 4 tablespoons of the flour. Stir gently to coat the blueberries evenly. Sprinkle the remaining flour and the sugar over the bottom of the prebaked crust. Pour the filling into the crust, spreading evenly.
5. Sprinkle the topping evenly over the filling. (It will be in a big mound on the top. The blueberries will shrink down during baking.) Bake the pie until the topping is golden brown and the blueberry filling begins to bubble, 50-60 minutes. (I did mine 60 mins) Transfer to a wire rack and let cool completely. Serve at room temperature. Best when served the day it is baked.