Monday, August 31, 2009
Potato Buttermilk Rolls

Tuesday, August 25, 2009
Classic Cornbread

From Williams-Sonoma Essentials of Baking
Ingredients:
1 cup cornmeal
1 cup all purpose flour
1 ½ teaspoons baking powder
½ teaspoon baking soda
½ teaspoon salt
2 cups fresh corn kernels (Optional, and I left them out)
2 large eggs
3 tablespoons honey or firmly packed brown sugar (I used brown sugar)
1 1/3 cups buttermilk (If you don’t have buttermilk on hand you can add 1 tablespoon lemon juice and then enough milk to equal 1 cup, then let sit for 5 minutes)
3 tablespoons unsalted butter
Directions:
1. Position a rack in the middle of the oven, and preheat to 425 degrees. Butter an 8 inch cast iron frying pan or 8 inch square baking pan.
2. In a bowl, whisk together the cornmeal, flour, baking powder, baking soda, salt and the corn kernels (if using). Set aside.
3. In a large bowl, whisk the eggs until blended. Add the honey (Or brown sugar), buttermilk, and butter. Whisk until blended. Add the dry ingredients and stir until evenly moistened.
4. Pour the batter into the prepared pan and smooth top with spatula. Bake until a toothpick inserted in the center comes out clean, 20-25 minutes. Let the bread cool slightly in the pan on a wire rack. Serve warm. Store at room temperature in an airtight container for 2-3 days. I highly recommend serving with honey butter!!
Currant Bread Pudding

Saturday, August 22, 2009
A Month...
Brioche

Wednesday, August 19, 2009
Currant Cream Scones

Ingredients:
For the dough
2 cups all purpose flour
¼ cup sugar
1 tablespoon baking powder
½ teaspoon salt
2 teaspoons grated lemon zest
6 tablespoons cold unsalted butter, cut into ½ inch pieces
½ cup dried currants (Or dried cranberries)
¾ cup heavy cream
For the topping
1 tablespoon sugar
1 teaspoon cinnamon
2 teaspoons whole milk or heavy cream
Directions:
1. Position a rack in the middle of the oven, and preheat to 425 degrees. Line a half-sheet pan with parchment paper (I used a silicone liner).
2. In a bowl, stir together the flour, sugar, baking powder, salt and lemon zest. Using a pastry blender or 2 knives, cut in the butter until the mixture forms large coarse crumbs the size of small peas. Stir in the currants. Pour the cream over the dry ingredients and mix with a fork just until the dry ingredients are moistened.
3. Turn the dough out onto a lightly floured work surface and press together gently until the dough clings together in a ball. Pat out into a round about ½ inch thick and 6 ½ inches in diameter. Cut the round into 6 wedges, or use a 3 inch biscuit cutter to cut out rounds. Place the wedges 1 inch apart on the prepare pan.
4. To make the topping, in a small bowl stir together the sugar and the cinnamon. Brush the wedges with the milk and sprinkle evenly with the cinnamon sugar.
5. Bake until golden brown, 13-17 minutes. Transfer to a wire rack to cool slightly. Serve warm. Store in an airtight container at room temperature for up to 2 days.
Orange Madeleines

Sunday, August 16, 2009
Challah

Friday, August 14, 2009
Brown Butter Blondies & Quiche Lorraine

 Brown Butter Blondies
Recipe from Williams-Sonoma Essentials of Baking
Ingredients:
1 ½ cups all purpose flour
1 teaspoon baking powder
½ teaspoon salt
2/3 cup clarified unsalted butter (recipe below)
1 cup firmly packed brown sugar
½ cup sugar
2 eggs
2 teaspoons vanilla extract
1 tablespoon fresh lemon juice, strained
(To make clarified butter: Slowly melt at least 1 cup unsalted butter in a small frying pan over low heat until it is foamy on the surface. Pour the melted butter into a small glass bowl and let stand for a minute or tow. You should see 3 distinct layers: milk solids on the bottom, clear yellow liquid in the middle and foam on top. Using a tablespoon, remove the foam from the surface. Pour the clear liquid into a clean container being careful to leave the milk solids in the bowl. Be sure to use more butter to begin with than calls for in the recipe, as you end up with less once it is clarified.)
Directions:
1. Position rack in the middle of the oven and preheat 325 degrees. Butter an 8 inch square baking pan.
2. In a bowl, sift together the flour, baking powder and salt. Set aside.
3. In a frying pan over low heat, heat the clarified butter until light brown and fragrant, about 6 minutes (mine took more like 15 minutes). Remove the pan from the heat and pour into a small bowl to cool slightly.
4. In a large bowl, combine the brown butter, brown sugar, and the sugar. Stir with a wooden spoon until blended. Mix in the eggs, vanilla and lemon juice until smooth. Stir in the dry ingredients just until incorporated. Pour the batter into the prepared pan, spreading evenly.
5. Bake until a toothpick inserted in the center comes out almost clean or with a few moist crumbs clinging to it, 35-45 minutes. Transfer to a wire rack and let cool completely.
6. If desired, using a sieve, dust with powdered sugar. Cut into 2 inch squares. Store at room temperature in an airtight container for up to 3 days.
Wednesday, August 12, 2009
Cinnamon Streusel Coffee Cake

Recipe from Williams-Sonoma Essentials of Baking
Ingredients:
For the filling:
2 tablespoons unsalted butter, at room temperature
3 tablespoons all purpose flour
1/3 cup firmly packed brown sugar
¾ cup chopped pecans or walnuts, toasted
1 ½ teaspoons cinnamon
For the batter:
2 ½ cups all purpose flour
2 teaspoons baking powder
½ teaspoon baking soda
¼ teaspoon salt
¾ cup unsalted butter, at room temperature
1 ¼ cups sugar
4 large eggs
1 teaspoon vanilla extract
1 ½ cups sour cream
Directions:
1. Position a rack in the middle of the oven and preheat to 350 degrees. Butter and flour a 10 inch tube pan or bundt pan. (I used a tube pan)
2. To make the filling, in a small bowl, combine the butter, flour, brown sugar, nuts, and the cinnamon. Using a fork, mix until crumbly. Set aside.
3. To make the batter, in a bowl, stir together the flour, baking powder, baking soda, and salt. Set aside.
4. In a large bowl, beat together the butter and sugar on medium speed with your mixer until creamy. Beat in the eggs, one at a time. Stir in the vanilla. Add the dry ingredients in 3 batches alternately with the sour cream and mix on low speed just until the batter is blended and almost smooth.
5. Pour half of the batter into the prepared pan and smooth the surface with a spatula. Sprinkle evenly with half the filling. Cover with the remaining batter and sprinkle with the remaining filling.
6. Bake until a toothpick inserted into the center comes out clean, 40-45 minutes. (Mine took 47 mins.) Transfer to a wire rack and let cool in the pan for 10 minutes, then turn out of the pan and let cool completely. Store in an airtight container at room temperature for up to 3 days or freeze for up to a month.
Tuesday, August 11, 2009
Pound Cake with Berry Coulis and Whipped Cream

Sunday, August 9, 2009
How many??
Friday, August 7, 2009
Flourless Chocolate Cake

Recipe from Williams-Sonoma Essentials of Baking
Ingredients:
½ cup walnuts
½ cup sugar
5 oz semisweet chocolate, chopped
5 oz bittersweet chocolate, chopped
½ cup unsalted butter
8 large eggs, separated, at room temperature
Powdered sugar for dusting
Directions:
1. Position a rack in the middle of the oven, and preheat to 300 degrees. Butter the bottom and sides of a 9-inch springform pan. Line the bottom with a circle of parchment paper cut to fit
2. In a food processor, process together the walnuts and the sugar until powdery.
3. Melt the butter and the chocolates using a double-boiler. (I melted the butter in the microwave, then added the chocolate and continued to heat in the microwave in 15 second increments in order to be careful not to scorch the chocolate.)
4. Using a stand mixer with the whip attachment beat the egg whites on medium-high speed until soft peaks form.
5. Whisk the egg yolks into the chocolate mixture. Using a rubber spatula, stir one-fourth of the egg whites into the chocolate mixture. Gently fold in the ground nut mixture. Add the remaining egg whites, folding gently and thoroughly. Pour the batter into the prepared pan.
6. Bake the cake until it puffs up a little and jiggles only very slightly when the pan is gently shaken, 30-35 minutes. If the center looks soupy, bake for another 5 minutes. Transfer to a wire rack and let cool in the pan for 3 minutes, then release and lift off the sides of the pan. Invert the cake onto a cardboard cake circle very carefully. The cake is very fragile when it is warm. Remove the parchment paper. Place on a wire rack and let cool completely. Cover the cake with a clean, slightly damp kitchen towel so that the outside does not dry out as it cools.
7. Using a fine sieve, dust the top of the cooled cake with powdered sugar. Serve with whipped cream if desired. Store in an airtight container at room temperature for up to 1 day.
Classic Dinner Rolls
 Recipe from Williams-Sonoma Essentials of Baking
Ingredients:
1 package (2 ½ teaspoons) active dry yeast
¼ cup warm water
1 cup whole milk
2 tablespoons sugar
2 large eggs, at room temperature, plus 1 egg beaten
6 tablespoons unsalted butter, at room temperature
4 ½ cups all-purpose flour, plus extra for kneading
2 teaspoons salt
Directions:
1. In a mixer, dissolve the yeast in warm water and let stand until foamy, about 5 minutes. Add the milk (I heated mine just slightly), sugar, 2 eggs, butter, flour, and salt. Place the bowl on the mixer, attach the dough hook and knead on low speed. Add a little more flour only if the dough is sticking to the sides of the bowl. Knead until the dough is smooth and elastic, 5-7 minutes. The dough should be soft but not sticky. Remove the dough from the bowl. *If you do not have a mixer all of this can be done by hand, first incorporating the ingredients with a whisk and then using a wooden spoon until a mass forms. Then scrape the dough out onto a lightly floured work surface and knead for about 5-7 minutes.
2. Form the dough into a ball, transfer to a lightly oiled bowl, and cover with plastic wrap (I also cover with a towel). Let the dough rise in a warm, draft free spot until it doubles in size, about 1 ½ to 2 hours.
3. Line a half sheet pan with parchment paper. (I used my silicone baking sheets)
4. Punch down the dough and turn it out onto a clean work surface. Cut it in half. Cut each half into 8 pieces (16 rolls total). Roll each piece against the work surface into a round ball. Place the balls onto the prepared pans, spacing evenly, cover loosely with a kitchen towel, and let them rise until puffy and pillow-soft when gently squeezed, 30-40 minutes.
5. Position a rack in the lower third of the oven, and preheat to 400 degrees.
6. Brush the rolls lightly with the beaten egg. Bake until puffed and golden brown, 20-25 minutes. Serve warm. (I baked mine 20 minutes and they would have been fine at 18)
Wednesday, August 5, 2009
Classic Dark Chocolate Brownies
Monday, August 3, 2009
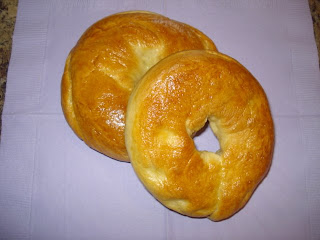
Egg Bagels


